Backup & Restore
QLSM can export the full operational state of this instance — database, SSH keys, Terraform state, instance configs, presets, and plugin binaries — into a single downloadable file, and restore that file onto another QLSM instance. This is the supported way to migrate QLSM to a new host without losing track of the QLDS servers it manages.
Backup & Restore is found at Settings → Backup & Restore.
What's Included
- The database: hosts, instances, users, preset metadata, your external API key, app settings (including a saved Vultr API key), and plugin binary descriptions.
- SSH keys used to manage your hosts.
- Terraform state for every provisioned host.
- Instance configs, non-built-in presets, and plugin/hook binaries.
Built-in presets are not included — they ship with QLSM itself and are restored from the Docker image on the new host.
REDIS_PASSWORD and SECRET_KEY are intentionally not included. Each QLSM host generates its own, and a mismatch after restore only means you'll need to sign in again — it doesn't affect any data.
Export A Backup
- Go to Settings → Backup & Restore.
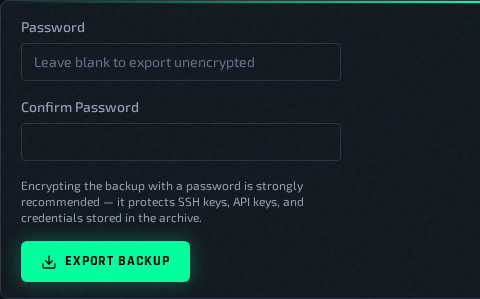
- Optionally set a Password and confirm it.
- Click Export Backup. The
.qlsmbakfile downloads to your browser.
When To Use A Password
A backup contains SSH private keys, your Vultr API key, user login credentials, and per-instance RCON/stats passwords. Use a password unless you're exporting for an immediate, trusted, local-only transfer (e.g. copying straight onto a USB drive you control).
If you leave the password blank, QLSM shows a confirmation dialog listing exactly what will be stored in plain text and requires you to check a box acknowledging the risk before the download starts.
Backups are encrypted with a password-derived key (Scrypt + AES-256-GCM) when a password is set. There is no way to recover a forgotten backup password — QLSM does not store it anywhere.
Import A Backup
Importing is destructive: it wipes this QLSM instance's database and every item listed under What's Included and replaces it all with the contents of the archive. Only import into a QLSM instance whose current state you're OK losing — typically a freshly installed one (see Migrate To A New Host below).
- Go to Settings → Backup & Restore.
- Under Import, choose the
.qlsmbakfile. - Enter the backup's password, if it has one.
- Type
RESTOREin the confirmation field. - Click Import Backup.
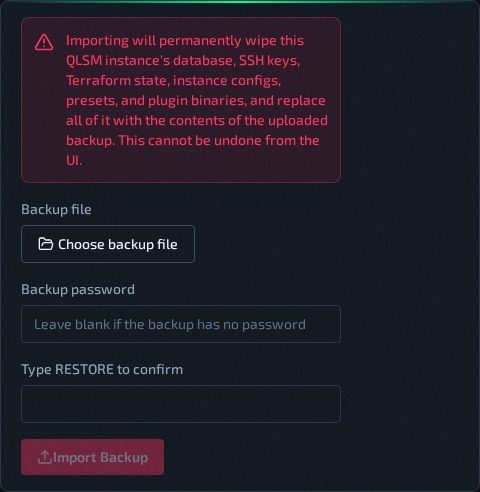
QLSM restores the database and files, then invalidates your current session — log in again afterward using the credentials from the restored backup, not your old ones.
Before making any changes, QLSM saves a safety-net snapshot of the instance's own prior state to backup_snapshots/ on the server (the 3 most recent are kept, older ones are pruned automatically). Treat these the same as any backup file — they contain the same sensitive material (SSH keys, API keys, credentials).
Migrate To A New Host
Use this flow to move QLSM itself to a new machine while keeping every QLDS server it manages running and reachable.
- On the old QLSM instance, export a backup (with a password — this file will briefly contain your SSH keys and Vultr API key).
- Follow Installation to stand up a fresh QLSM instance on the new host. Do not add any hosts or instances to it yet.
- On the new instance, go to Settings → Backup & Restore and import the backup you exported in step 1.
- Log in with the credentials from the restored backup.
- Confirm your hosts and instances appear exactly as they did on the old instance.
- Spot-check that automation still works: open a host's detail view and confirm Terraform recognizes its existing VM (no unexpected "not found" or plan-to-recreate state), and use the RCON console or Edit Configs on an instance to confirm SSH still connects.
Because Terraform state and SSH keys are part of the backup, the new instance can manage your existing cloud VMs and standalone hosts immediately — nothing needs to be re-provisioned or re-keyed.